
I posted this on NMA, but if you don't go to NMA, then just read this post.
I acquired this information myself, and I use Windows 7 x64
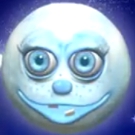
Proof image, http://img19.imageshack.us/img19/2749/proofj.png
With the help of the bounding box in red-viewer program, I was able to get the correct camera settings by trial and error.
Tested with GIMP 2.68 and Blender 2.492
Transform Properties
Loc X 5
Loc Y -5
Loc Z 4
RotX 60
RotY 0
RotZ 45
Scene
OSA 8
100%
Sky
Sta 1 End 1 (change if you want animated graphics)
Step 1
sizeX 300
sizeY 300
AspX 100 AspY 100 (you could experiment with this, but I didn't)
PNG
Quality 100
RGBA
Camera Lens
Scale 15
Orthographic Enabled!
Dof Dist 0.00
Clipping Start/End
Start .10
End 100.00 (changing the clipping may also prove beneficial)
Size .500
Shift X 0.00 Shift Y 0.00
Choose Render Animation, and by default you should get a PNG of your 3D model, and with Transparency ready.
Here is some tips/reminders:
Tip #1: If you use Gimp, Use the Color Posterizer and set to 6 to keep palettes small. (you may be able to go higher if you are using only one frame, ie a static object)
Reminder #1: Use the PNG to ZAR tool included with the 1.27 Editors to convert images to a format for tiles.
Reminder #2: .SPR (or sprite files) are best made with Sprite_Creator from Jarekfall. And the sprite creator imports .bmp only, so save as A8R8G8B8 BMP and you should be ok.
Tip #2: Dont waste time rendering your object for it's opposite directions, if your object is symmetrical in those two directions.
Tip #3: Two ways to crop image in Gimp, select using Fuzzy Select tool, then invert selection so it surrounds only your graphic, or use auto-image crop. (ofcourse)
Any inaccuracies in this information you find, let me know, or if you can provide a solution/correction.
3D to 2D Information (Re-post)
